Integration Instructions
- Log in to your Postmark account.
- Navigate to the “Servers” tab and select or create a server to use with Dittofeed.
-
Go to the “Message Streams” tab for your selected server.
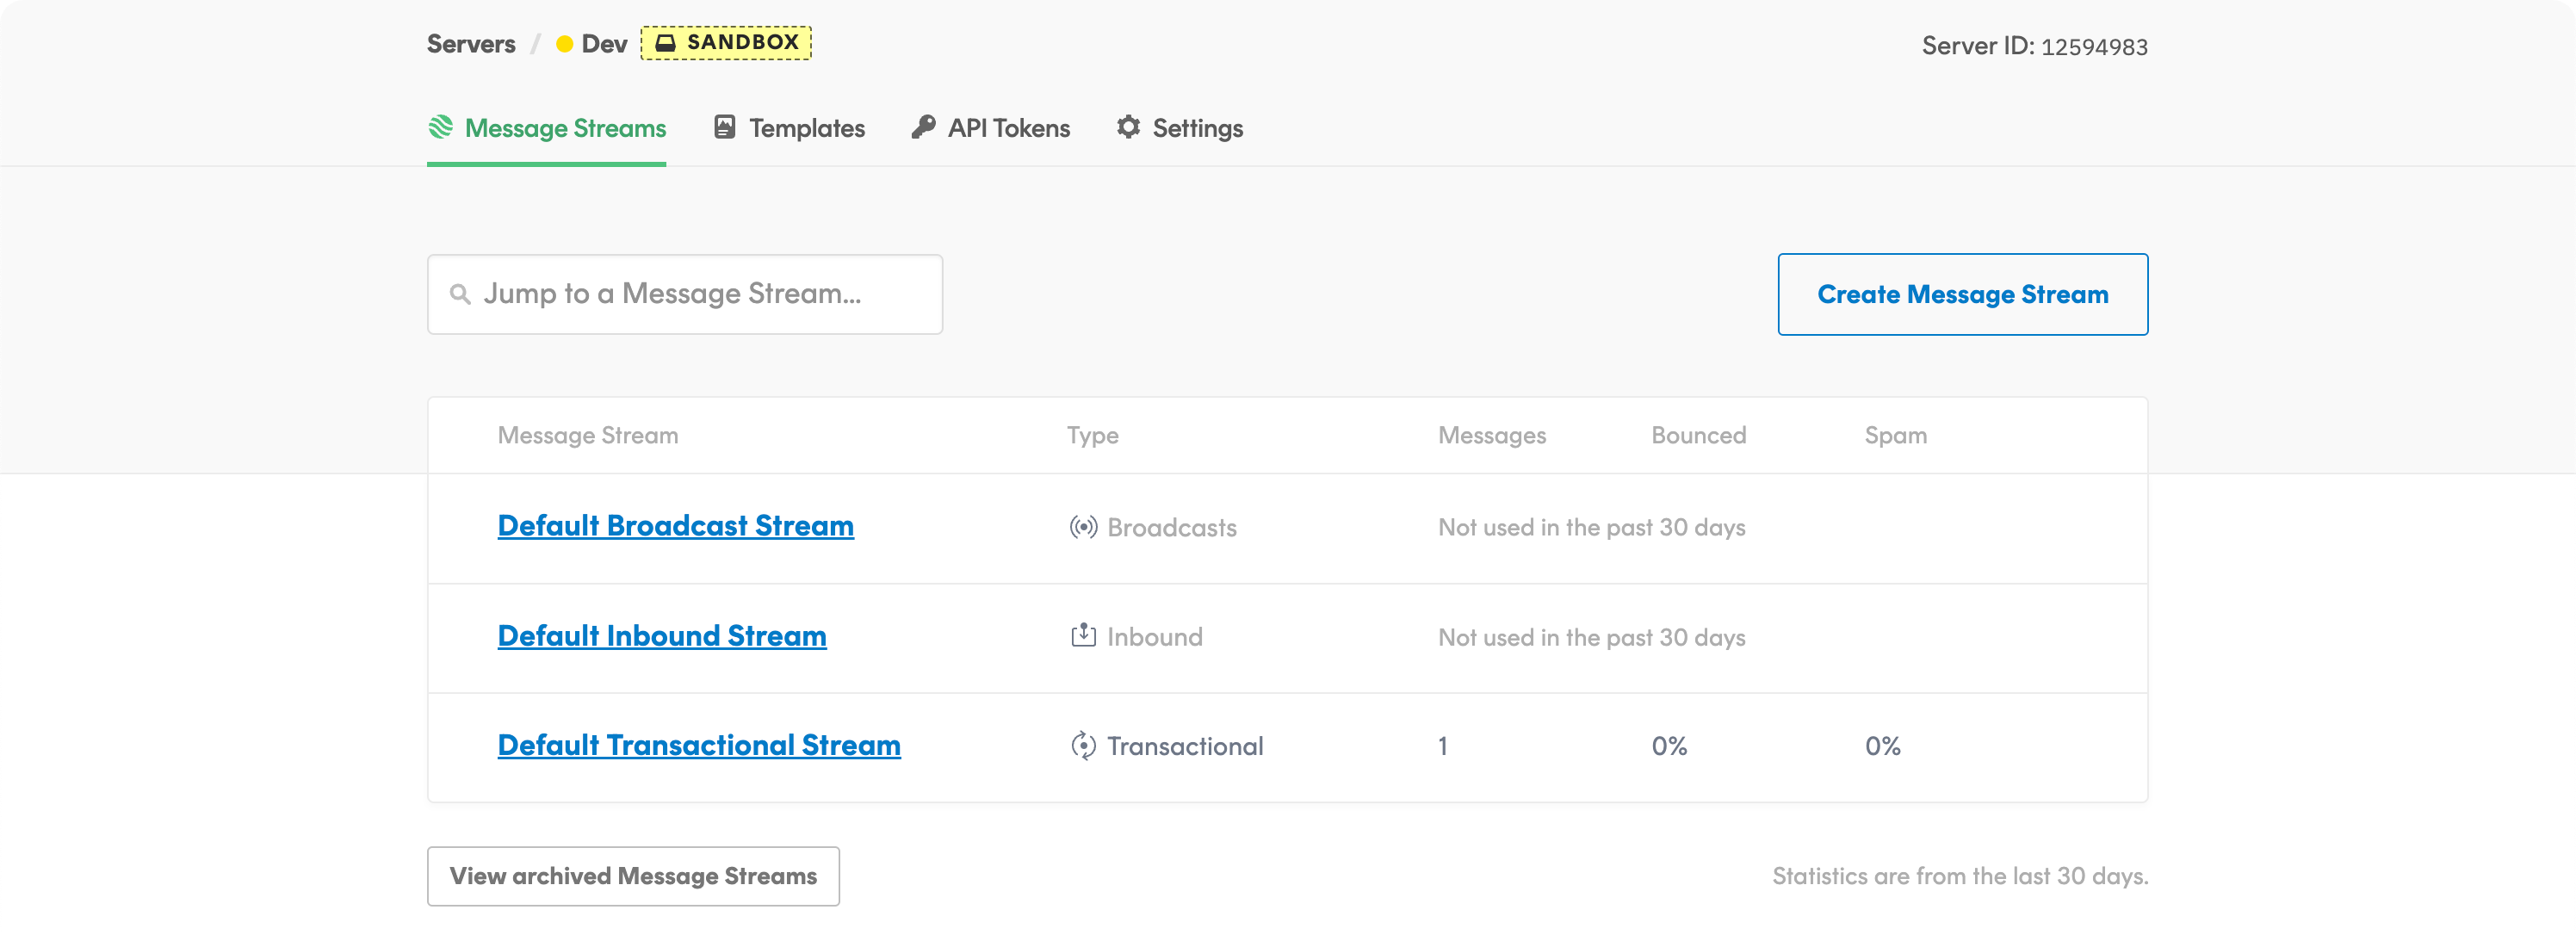
- Click on “Create Message Stream” to set up a new stream for Dittofeed or select an existing one.
-
Once your stream is set up, go to the “API Tokens” tab.
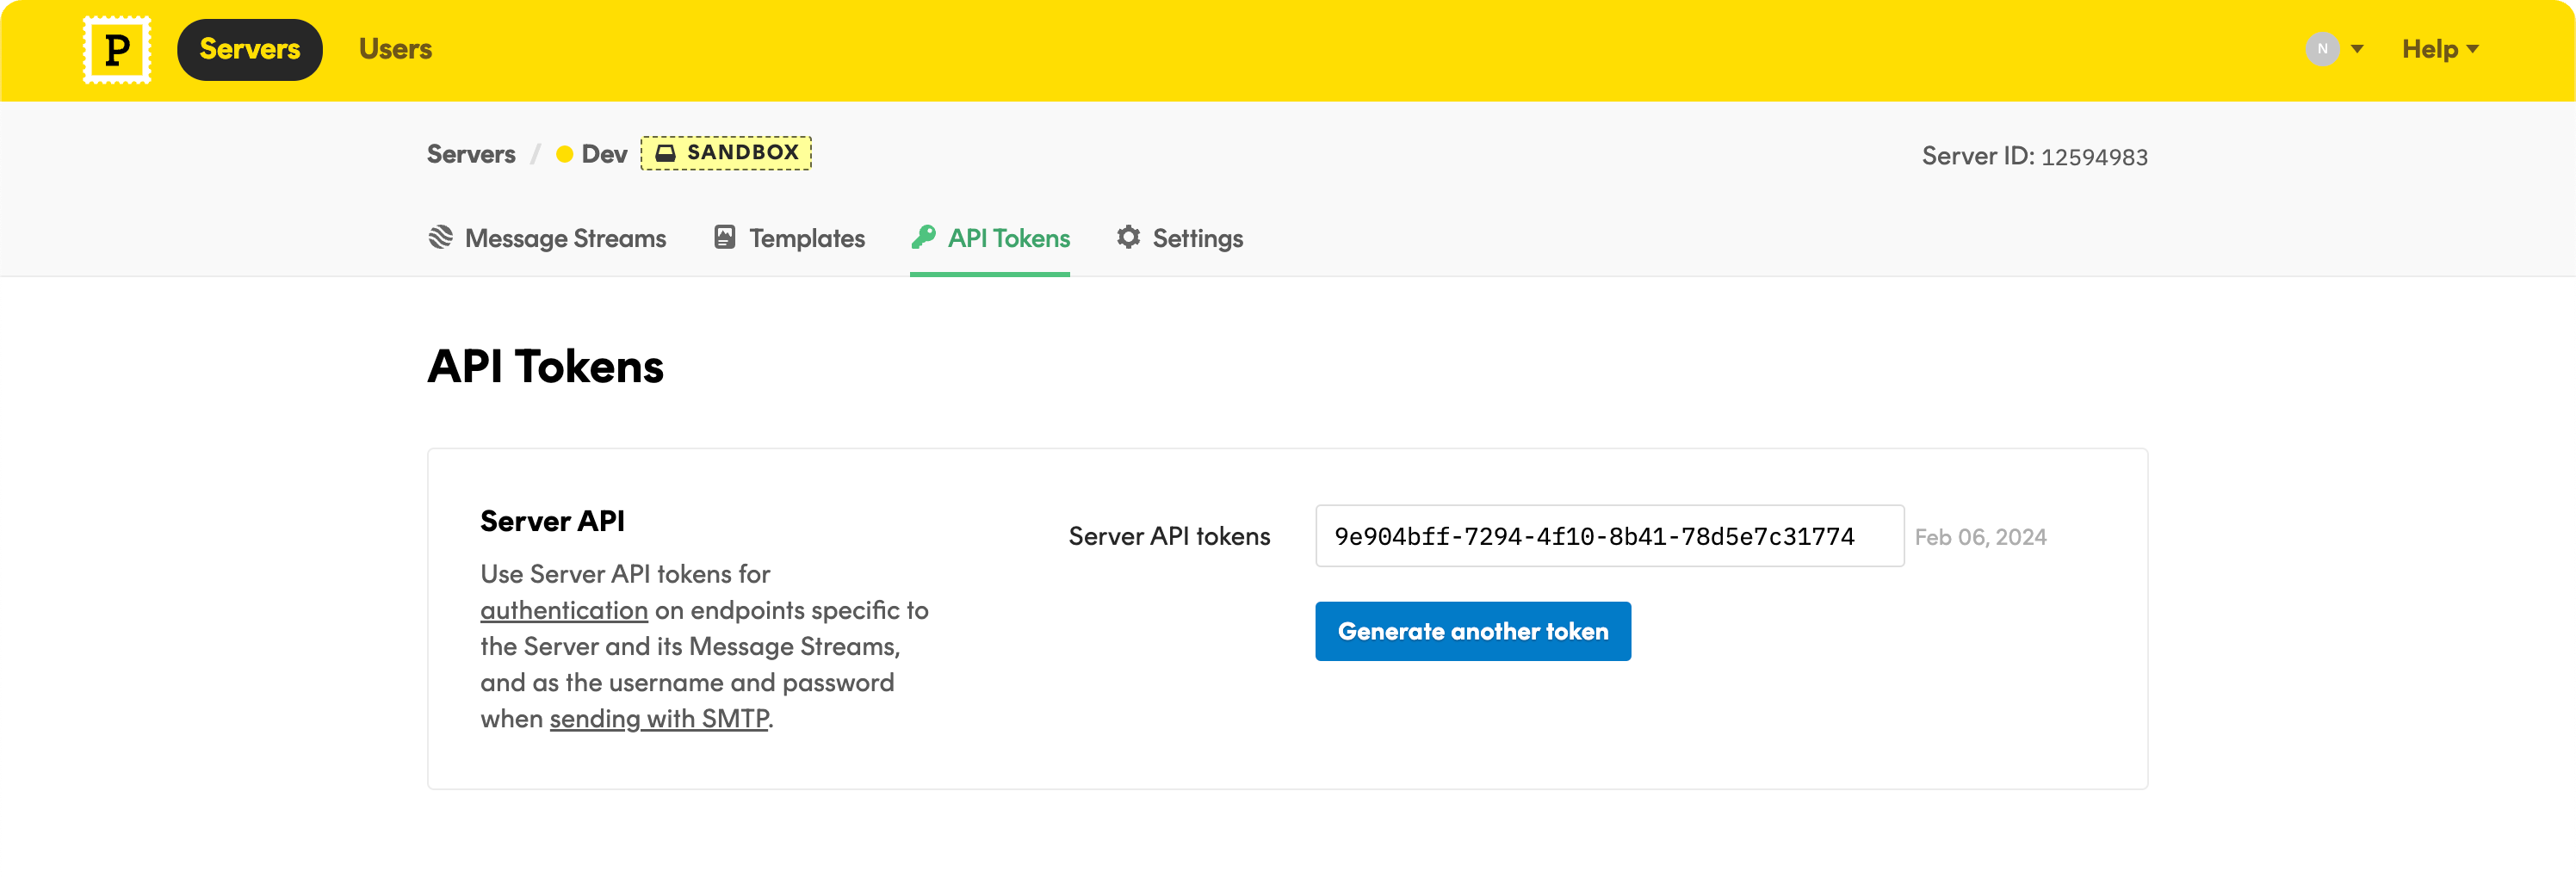
- Create a new API token by clicking “Create API Token”. Give it a descriptive name and ensure it has “Server” permissions.
- Copy the generated API token.
-
Add this API token to Dittofeed on the Settings page
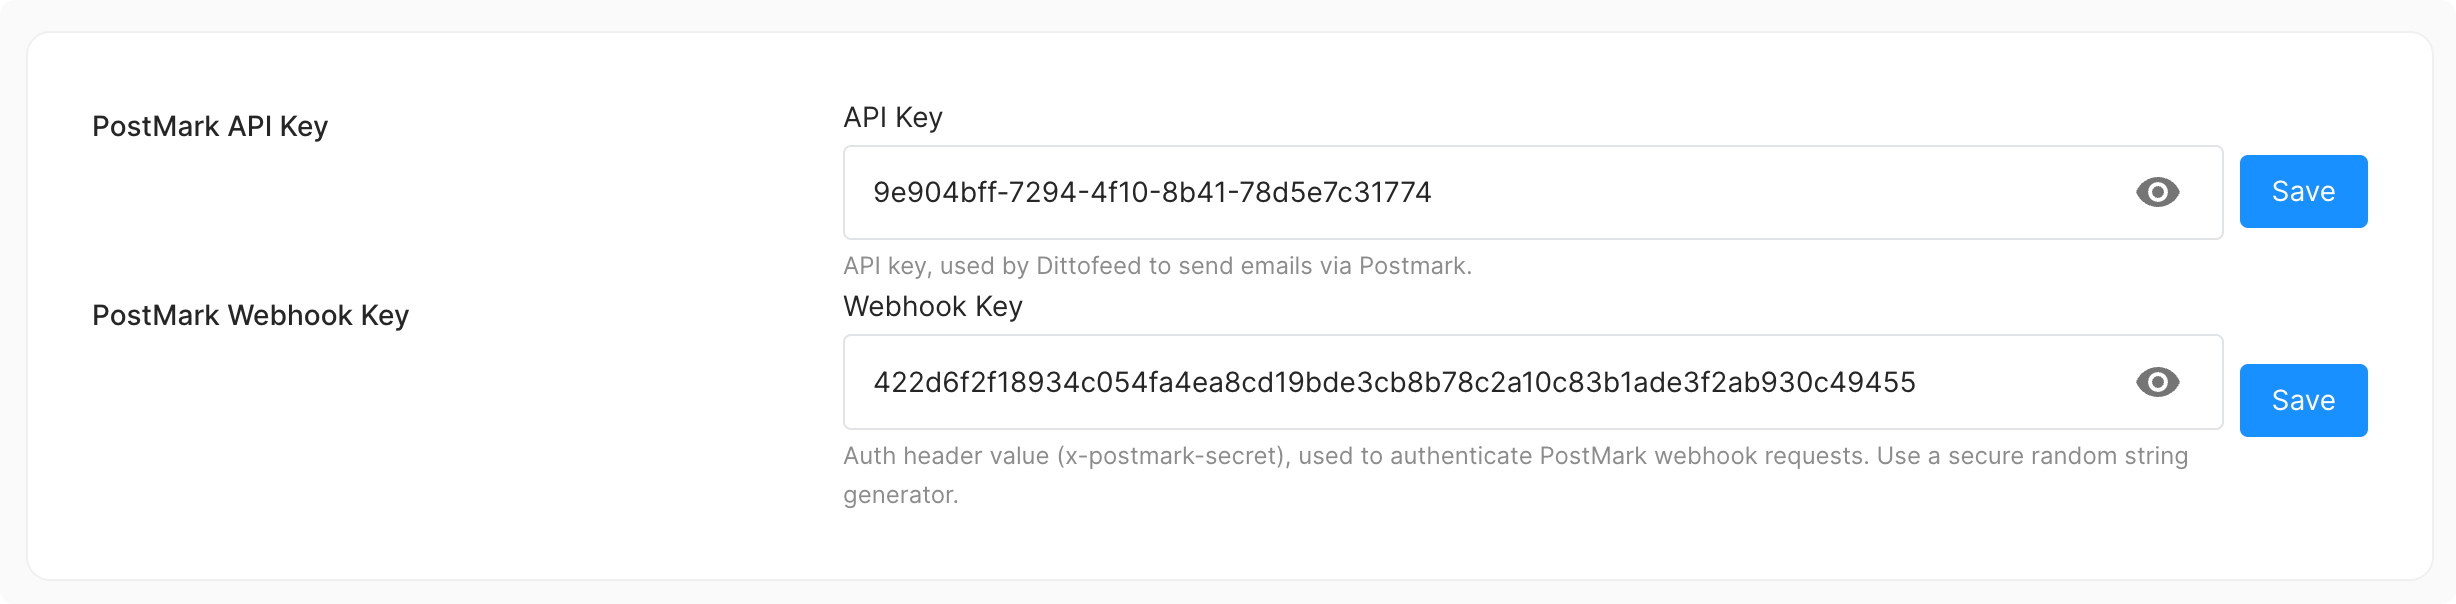
- Set Postmark as your default email provider in Dittofeed’s settings.
Webhooks for Tracking
To track email events with Postmark, follow these steps:-
Within your server, go to the “Webhooks” tab.
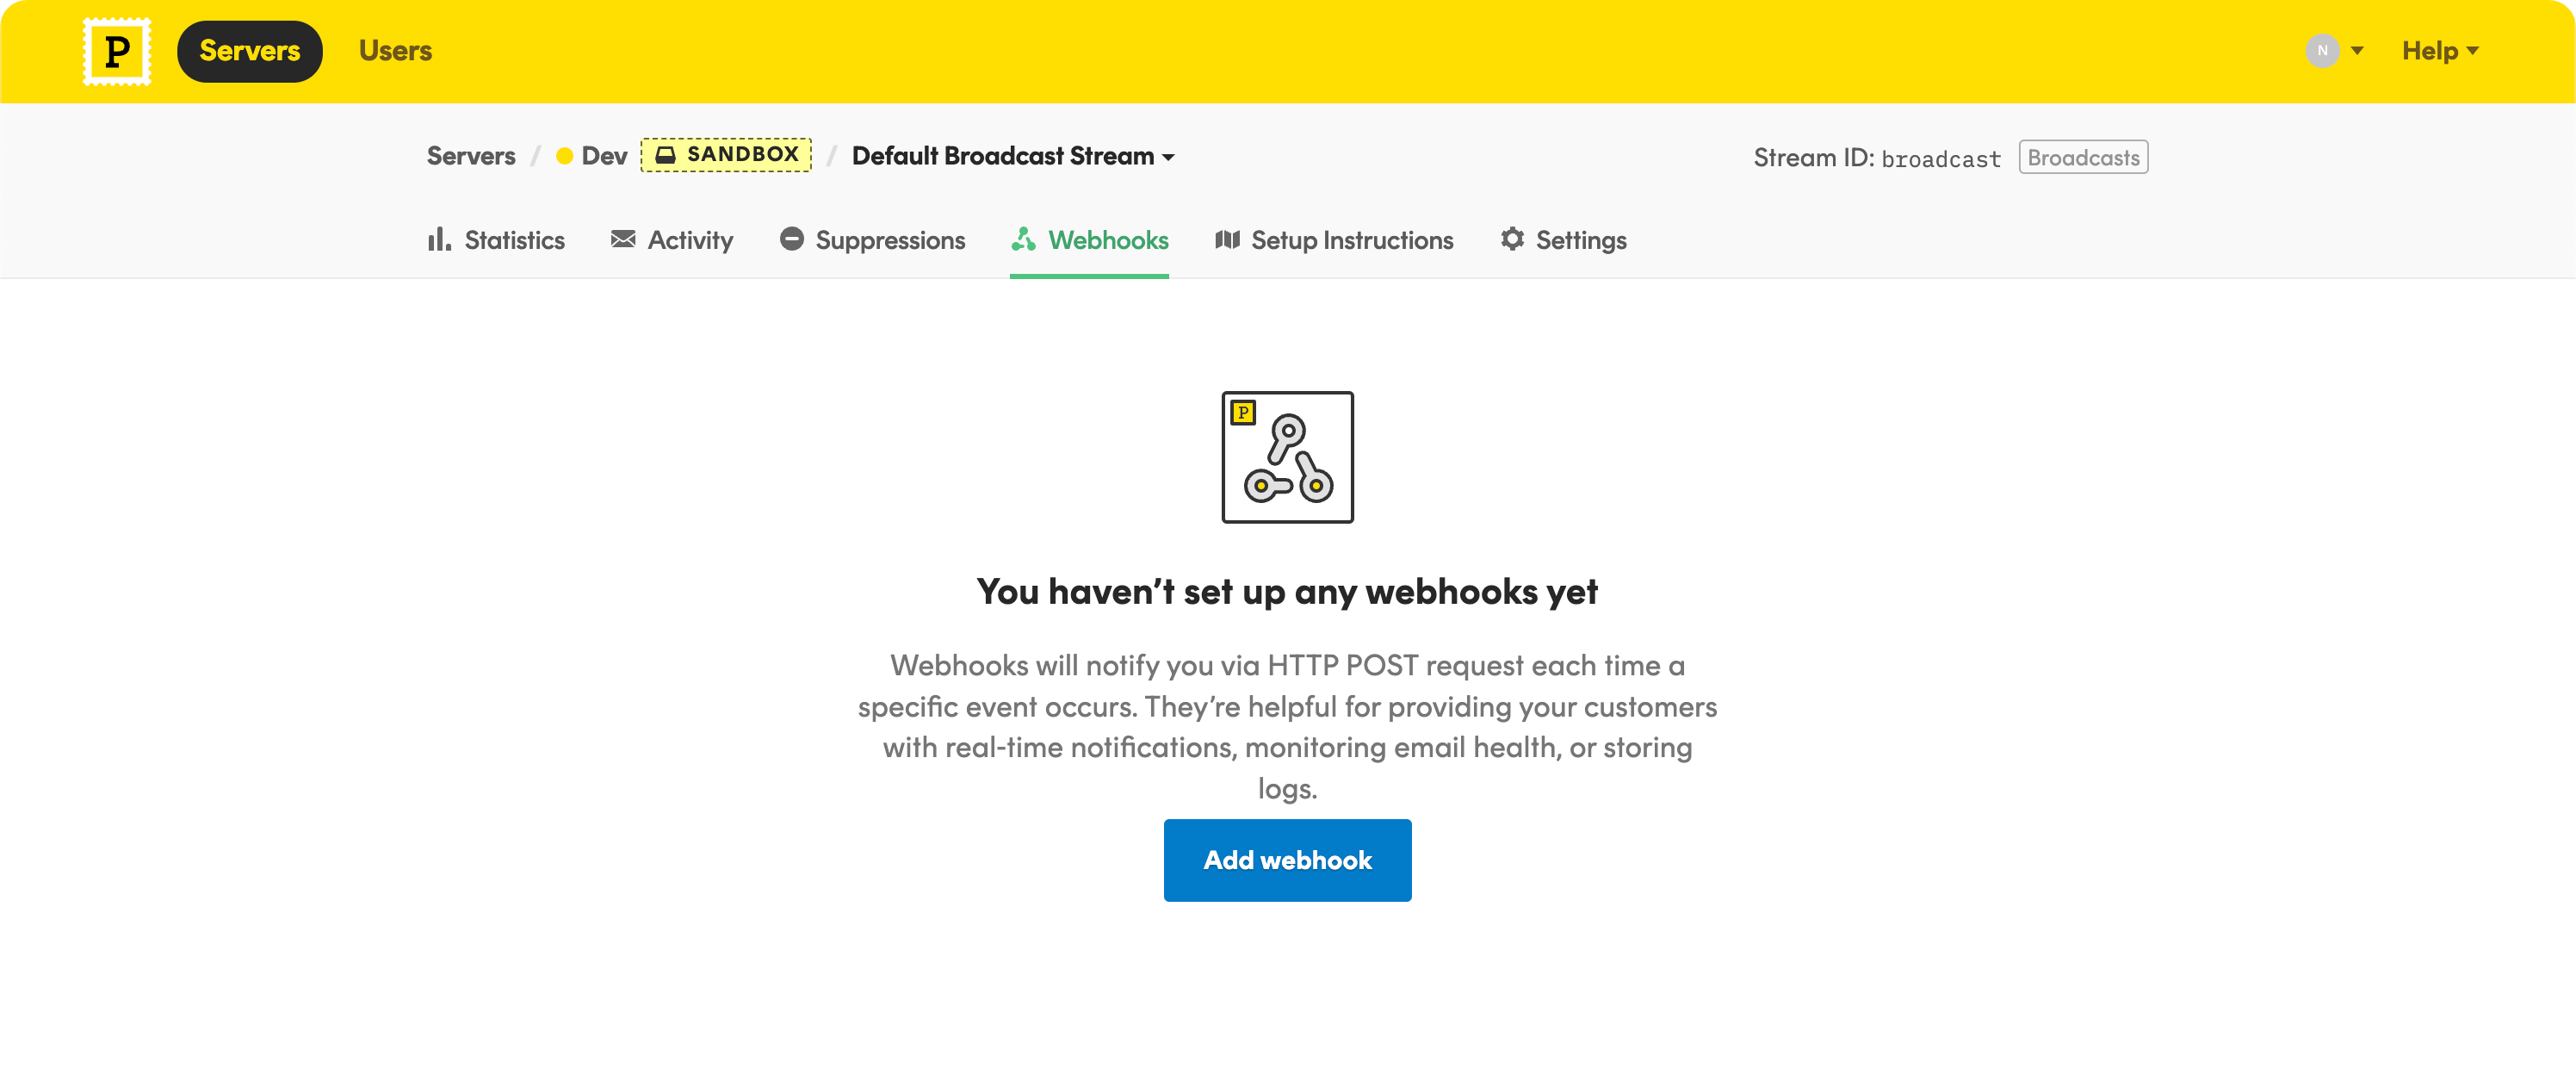
- Click “Add webhook” to initiate a new webhook setup.
-
For the Post URL, input
https://app.dittofeed.com/api/public/webhooks/postmark -
In the “Custom headers and basic auth” section, add a custom header named
x-postmark-secret. For the value, use a secret you generate. You can generate a random key usingopenssl rand -hex 32in your terminal or use an online random key generator. -
Choose the events for which you wish to receive webhooks, such as Delivery, Bounce, Spam Complaint, Open, Link Click, and Subscription Change.
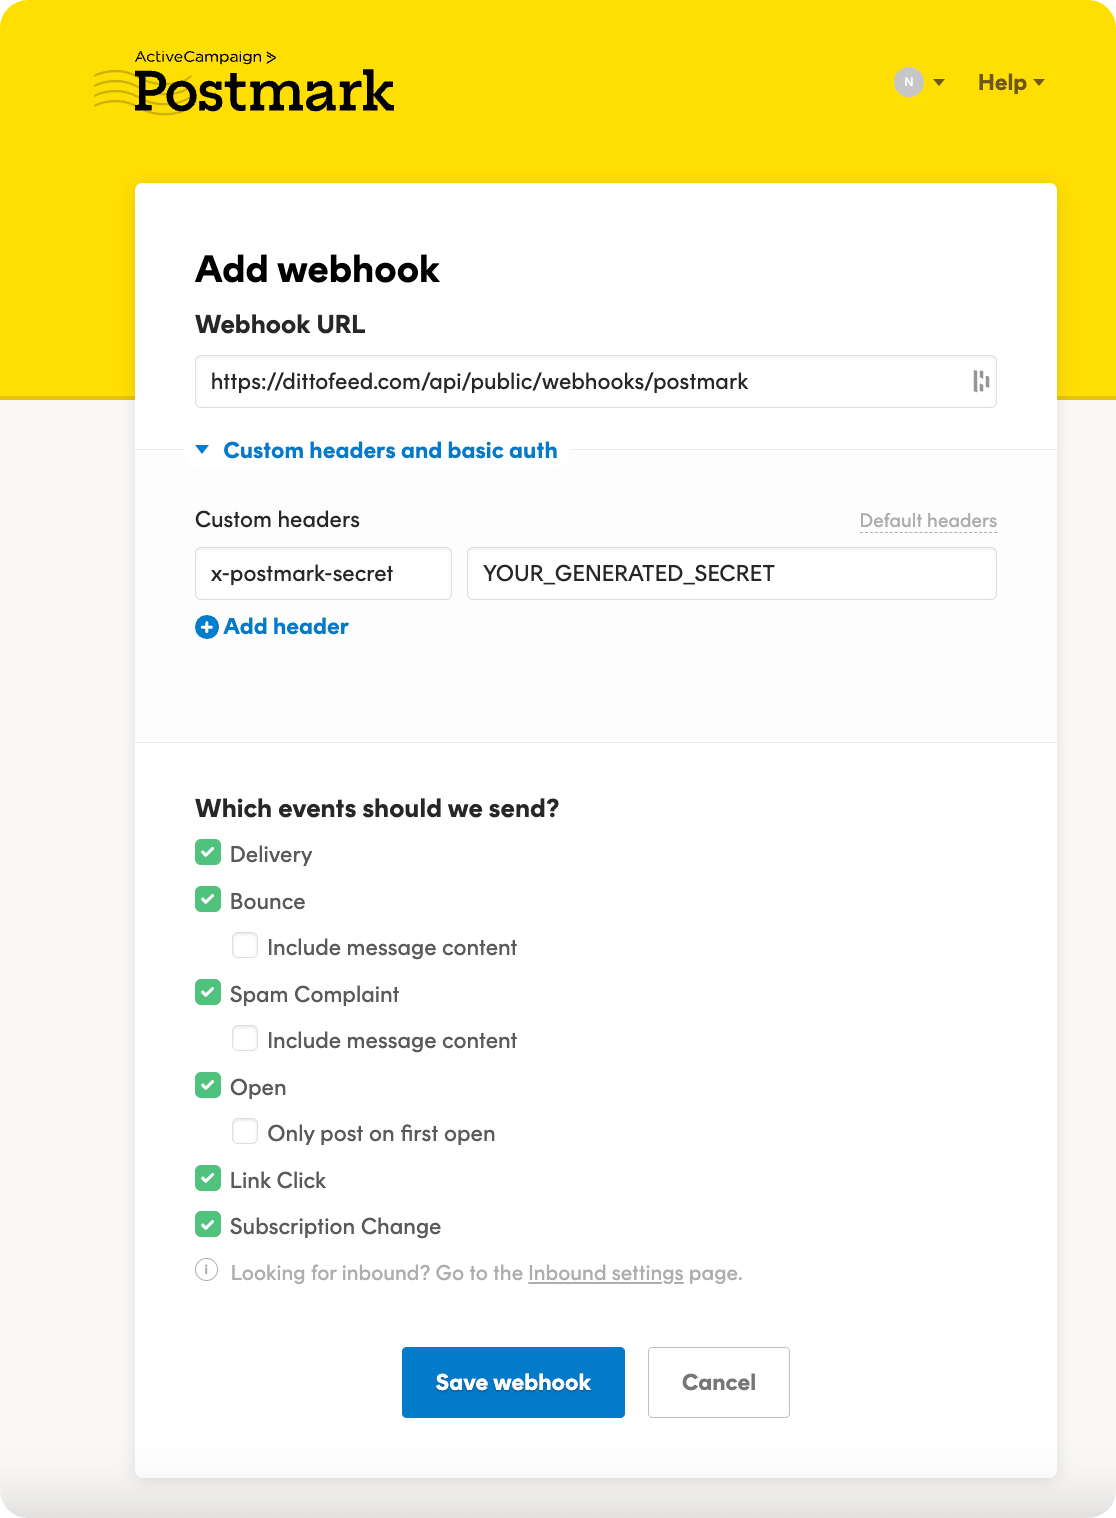
- Click “Save webhook” to activate it.
- Copy the webhook’s signing secret if provided.
-
Paste the signing secret into Dittofeed’s settings page in the “Webhook Key” field and click save.