> ## Documentation Index
> Fetch the complete documentation index at: https://docs.dittofeed.com/llms.txt
> Use this file to discover all available pages before exploring further.
# Self-Host with Render
This section outlines the necessary steps to run Dittofeed on the platform [Render](https://render.com/).
Click Deploy to Render below and follow the prompts to deploy Dittofeed on Render.
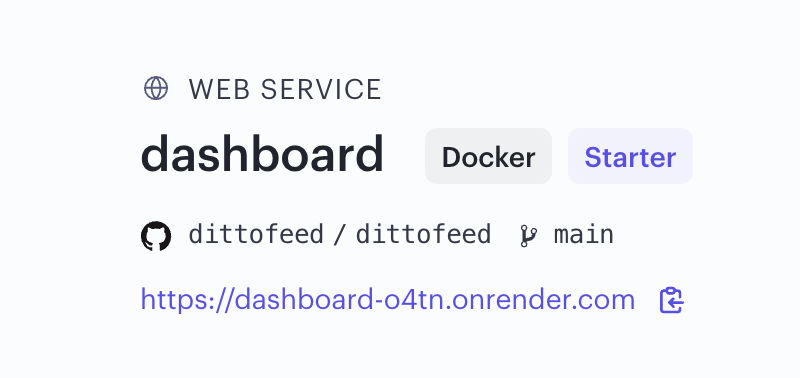
 ## Visit the Dashboard
You can now visit the dashboard, whose URL is listed on the dashboard service page.
## Visit the Dashboard
You can now visit the dashboard, whose URL is listed on the dashboard service page.
 ## Submit Data to the API
You can submit data to your instance of the Dittofeed API by passing your instance's url to the Dittofeed SDK.
```javascript theme={null}
DittofeedSdk.init({
writeKey: '...',
host: 'https://PLACEHOLDER.onrender.com',
});
```
## Admin CLI
By default, the Admin CLI is deployed as a worker service. You can access the Admin CLI by accessing the service's shell `https://dashboard.render.com/worker//shell`.
The admin-cli's primary use is in facilitating version upgrades to Dittofeed.
## Submit Data to the API
You can submit data to your instance of the Dittofeed API by passing your instance's url to the Dittofeed SDK.
```javascript theme={null}
DittofeedSdk.init({
writeKey: '...',
host: 'https://PLACEHOLDER.onrender.com',
});
```
## Admin CLI
By default, the Admin CLI is deployed as a worker service. You can access the Admin CLI by accessing the service's shell `https://dashboard.render.com/worker//shell`.
The admin-cli's primary use is in facilitating version upgrades to Dittofeed.
 You can delete the Admin CLI service in its settings when you don't need it anymore and redeploy it by manually resyncing Dittofeed's blueprint.